
Prodesk Elitedesk Cooling Problem Mod Solution
- G3R

- 6 mar 2022
- 4 min de lectura


As first I have to tell you that my G3 have an i5-7500T that I use as emulation center from Nes to Wii U, so playing Breath of the Wild on CEMU get the cpu to 85 to 90C° and this temp for a mini desktop and CPU, it's not good, so I have to think many ways to solve this problem wich includes on testing a UX100 and a Aerocool Core Plus aRGB, everything ended on a Aerocool Verkho 3, but let's start with the tutorial:
What we need:
• Torx like screw for the CPU cooler
• Motortool
• Sanding Drum for Motortool
• Driller
• Metal drill bits
• Aviation snips, also called tin snips or compound snips
• Verkho 3 Cooler or similar go to Xxx step to check if you can made it compatible for your mini PC
• Decal sticker for cars of anything you like, you can see I used carbon fiber like
• Stainless steel wire *
• Snipe nose pliers or a pliers at least
• Powerful welder something can reach 450C°
• Security Gloves 🧤 against cut if possible
• Security Glasses
• Sand paper 200 or closer
• Patience for bending the wire
• Thermal Paste
• Thermal Pad if you damage one for replacement
*The stainless steel wire in my country is so difficult to find so you can take the wire from a Stainless Steel Balloon.
*Disassembly*
You can follow this video guide if you want: https://youtu.be/2_YlOkA-9yo
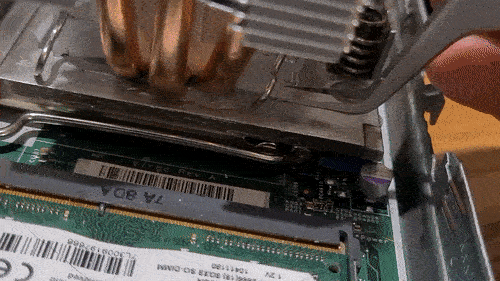
Disconnect the fan and remove:


Unscrew the CPU heatsink cooler and remove:

*Heatsink Cooler*
"Cleaning"
Now the real work will start:
Remove the black sticker from the Cooler and you will get something like this:


The metal plate of this piece are like a chain keep this in mind before remove, with the gloves and the Snipe nose pliers star from one side to other and remove as much as you can of the metal plate try to use the pliers to roll the pieces one by one.
Take your time a make it slow you can cut your hands very easy.
Once you ended removing the metal plates you will get a dirty piece with some metal pieces that keep joined to the heatsink


* Recreation
To remove the metal scraps from the heatsink you will have to use the welder at its maximum power like 450C° (don't burn your hands use heat gloves or similar).
If anything go well you have a ugly piece with no metal plate but with some tin on surface, that needs some sand paper to get a clear surface, remember that with a plain surface over the CPU will guarantee a best cooling coefficient
The result is something like that:

* It have some thermal paste (yes I used a lot)
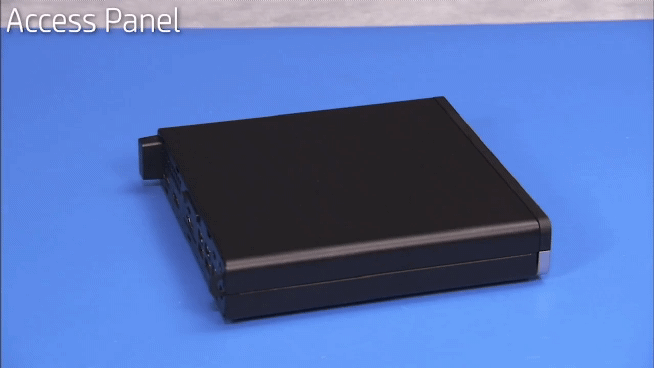
Access panel (Upper cover)
"Drilling and Sanding"
On this step wee need to take some measurements of the cover to make the hole I used the support of one cooler as guide:


More reference images to locate the hole over the CPU and give space to the "support pins"


The measurements:


To make the hole you can start with the Motortool making holes around the guide drawed with the support something like this:
Reinforce the holes with the driller and cut between it with the with the Aviation snips.
Finally to make the hole more "circular" with the Motortool and sand drum, remember to make it on a free area, it will generate sparks that can turn on flames, also use the security glasses.
Finally you will got a perfectly hole on the Upper cover like this:


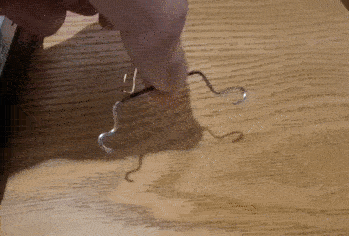
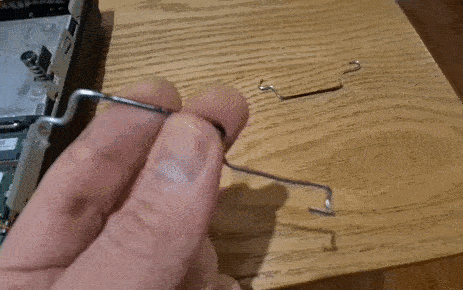
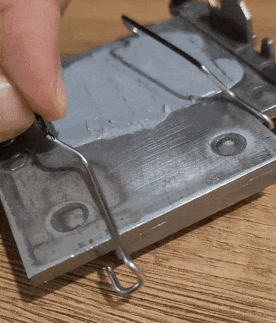
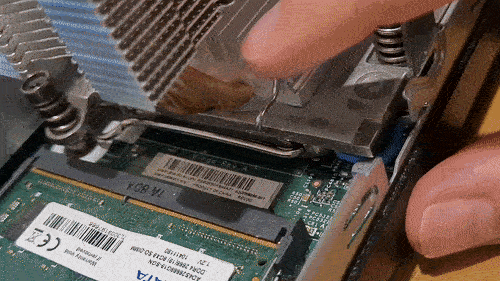
Stainless Steel Wire Holders
For this step you need a lot of photos because, this holders are fully handmade use the images as guides there are not measurements only try to keep the cooler alignment with the processor I made marks with marker to find the center like this:


Now you have to make the metal holders by bending the wire I make a few try's with copper wire and the result is this:


Support A:
Support B:
More reference photos:


How Support B fits on heatsink:
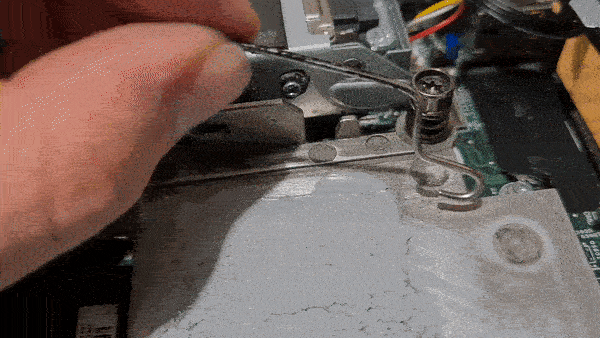
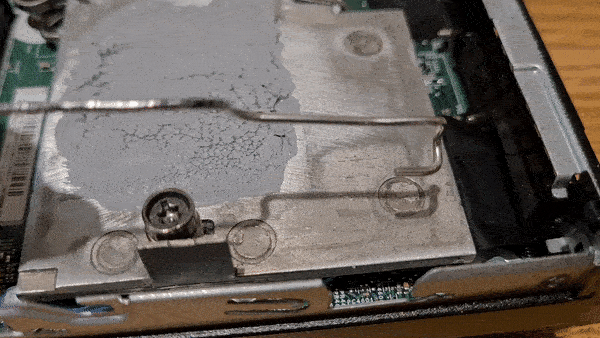
Installation test:


4 pins PWM Adapter
Almost finished for the adaptor we need the original part of the fan with the cable and a 4 PWM female connector and if you don't have that connector this not a problem you can make the adaptor directly from the cable for this purpose i give you the pinout:


Vinyl Decal Installation * Optional
For this point I prefer let you a link from the process with experts:
https://youtu.be/so3w0SNMdGs
Remove I/O Flex port * Optional
As you can see on the photos I removed the additional I/O Flex card to give access directly to the fan adapter from outside and to give a little air entrance, if you don't do this you have to figure out how to connect the fan before close the upper cover.
Final Assembly
At this point only left assembly the mini PC put the holders and test if it can keep the new cooler on its place.
So i will give you a photo guide:
1.Attach the cables of the fan:


2. Screw the heatsink (Dont forget the thermal paste):


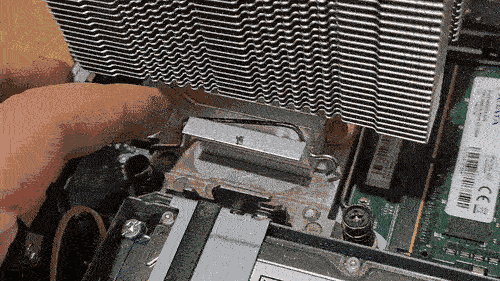
3. Locate the supports preparing them to attach the Verkho 3 Cooler:


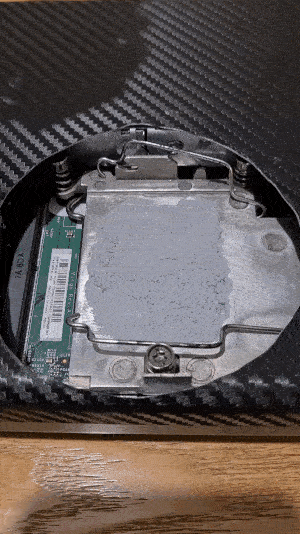
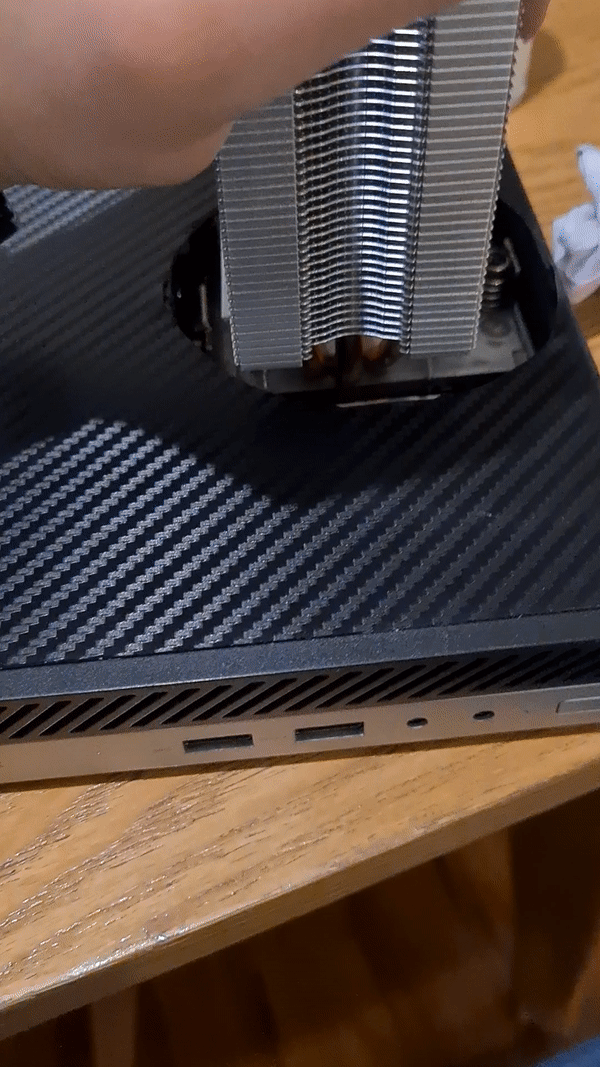
4. Put the upper cover:


5. locate the verkho heatsink over the original hp heatsink (Dont forget the thermal paste, Yes again):
6. Put the supports and atach it (This is one of the more difficult points so i will left a lot of photos from the atachment procces without the upper cover to you for practice):
Test atachment without upper cover:
Test installation:
7. Testing and results:
First test of temp with hwinfo and Cpuz
No Load / No Mod

*With no load CPU keeps on 50°C on Windows 10 Pro
Load / No Mod

*With CPUZ Stress test CPU rises to 76°C on gaming it goes like 79°C so i shutdown the Mini PC
Now lets see the magic happens:
No Load / Mod

* It goes to 25°C average, the differences are absurd so 25°C Less
Load / Mod

* With the mod on stress test the diference was 76°C to 40°C average something like 36°C of diference its a improvement of 190%
Thats all thank you for read (sorry for my english)
Hope you enjoyed!!


Comentarios